The post In-N-Out Secret Menu appeared first on Life With Denise.
]]>
When you think of iconic fast-food chains, In-N-Out Burger often comes to mind. Known for its fresh ingredients, simple menu, and unbeatable taste, In-N-Out also hides a treasure trove of secret menu items that take the experience to the next level. If you’re a fan of the classics but are eager to spice things up, it’s time to dive deep into the In-N-Out secret menu.
Most people that aren’t familiar with In-N-Out, order items straight from the menu and wonder what all the hype is. Well, I’m here to tell you that when you live in California long enough, you start learning all the tweaks you make to the items that make them taste sooo good!!
With a few special orders and tweaks, you can enjoy more than what meets the eye. From customizable burger options to loaded fries, this guide will give you all the details about the In-N-Out secret menu and what your favorite celebrities love to order.
What Is the In-N-Out Secret Menu?
You may have heard whispers about it, but what exactly is the In-N-Out secret menu? This unadvertised selection of food isn’t displayed on the menu boards at the restaurant, but it exists for those in the know. Through a combination of fan requests and insider knowledge, these items have gained cult status. While these menu hacks started organically, they are now embraced by In-N-Out employees who are happy to make your customized orders come to life.
The In-N-Out secret menu includes unique burger combinations, exciting toppings, inventive takes on fries, and drink options that you won’t find on the regular menu. Whether you’re looking to elevate your burger game or indulge in an over-the-top milkshake, there’s something for every adventurous eater.
Animal Style: The Legend
Arguably the most famous item on the In-N-Out secret menu is the Animal Style burger and fries. What exactly makes it so special? For the burger, you get a patty cooked in mustard, extra pickles, grilled onions, and a generous serving of In-N-Out’s signature spread.

Meanwhile, the Animal Style fries come smothered in melted American cheese, grilled onions, and more of that spread.

Want to take your order a step further? Try getting both your fries and burger Animal Style for a full experience. Not only will this upgrade leave you satisfied, but it’s a fan favorite for a reason.
Example of a Celebrity Favorite: Did you know that Ryan Gosling is a big fan of the Animal Style burger? In interviews, he’s been quoted saying it’s his go-to order whenever he visits.
Protein Style: A Healthy Twist on the In-N-Out Secret Menu
Not a fan of the traditional bun? The Protein Style burger from the In-N-Out secret menu offers a delicious low-carb alternative. Instead of the classic fluffy bun, your burger is wrapped in crisp lettuce. This option is perfect for anyone looking for a healthier take without sacrificing the flavor that In-N-Out is known for.
While the Protein Style burger is a lighter choice, it still packs all the savory goodness of a traditional burger, from juicy beef patties to fresh toppings. You can even customize it further by adding grilled onions or extra cheese, making this secret menu item highly versatile.
Celebrity Fan: Kim Kardashian, known for her strict diet, has been spotted ordering the Protein Style burger. It’s one of her preferred options when she craves fast food while sticking to her fitness goals.
The 3×3 and 4×4: Stacking Up the In-N-Out Secret Menu
Sometimes one patty just isn’t enough. Enter the 3×3 and 4×4, two towering burger options that feature three or four beef patties stacked between slices of cheese. These heavy hitters from the In-N-Out secret menu are designed for anyone with a massive appetite.
To order, just request a 3×3 or 4×4 by name, and you’ll be presented with a burger that’s equal parts intimidating and delicious. Pair it with Animal Style fries for an ultimate In-N-Out feast.
Fun Fact: Will Ferrell, the comedic legend, once admitted that he loves a hearty burger, and the 4×4 from the In-N-Out secret menu happens to be his choice for satisfying hunger on set.
Grilled Cheese: A Classic from the In-N-Out Secret Menu
For those who don’t eat meat but still want to indulge in the In-N-Out experience, the Grilled Cheese is your go-to secret menu item. It features two slices of melted American cheese between toasted buns, with all the fixings like lettuce, tomatoes, and onions. This vegetarian-friendly option maintains the classic flavors while offering a meatless twist.
You can customize the Grilled Cheese to your liking, adding grilled onions or extra cheese for even more flavor. Although it’s simple, this option remains one of the most beloved items on the In-N-Out secret menu.
Celebrity Favorite: Natalie Portman, a known vegetarian, loves the Grilled Cheese when she stops by In-N-Out. It’s one of the best plant-based options on the menu!
Flying Dutchman: The Ultimate Burger Hack on the In-N-Out Secret Menu
Looking for something truly unique? The Flying Dutchman on the In-N-Out secret menu is unlike any other burger you’ve encountered. It consists of two beef patties with two slices of American cheese sandwiched between them. No bun, no vegetables—just pure meaty and cheesy goodness.
This minimalist item appeals to burger purists who crave nothing but the essentials. It’s also keto-friendly, as it skips the carbs completely. For an added twist, some customers even add grilled onions to their Flying Dutchman, making it a simple yet flavor-packed experience.
Did You Know? Celebrity chef Anthony Bourdain, a burger lover, once praised the Flying Dutchman as one of his favorite off-menu items at In-N-Out.
Neapolitan Shake: The Sweetest In-N-Out Secret Menu Item
Who says you can’t have it all? The Neapolitan Shake combines all three of In-N-Out’s shake flavors—chocolate, vanilla, and strawberry—into one delicious concoction. This creamy delight is perfect for anyone who has trouble choosing between flavors, and it’s sure to satisfy your sweet tooth.
For an even richer experience, try pairing your Neapolitan Shake with an Animal Style burger or fries. The balance between savory and sweet is unbeatable, and the flavors blend together seamlessly.
Fun Fact: Gigi Hadid, supermodel and food enthusiast, often shares her love for the Neapolitan Shake on social media, proving that even those in the limelight can’t resist this secret menu treat.
Double Meat: Another Protein-Packed Gem from the In-N-Out Secret Menu
For those who love a simple but filling burger, the Double Meat is a lesser-known option from the In-N-Out secret menu. It’s exactly what it sounds like—two beef patties with all the traditional burger toppings, minus the cheese. This option is perfect for anyone who enjoys the taste of beef without being overwhelmed by too much cheese or additional condiments.
Since this burger keeps things simple, it appeals to purists who just want more of that classic beefy flavor.
Celebrity Pick: Kobe Bryant, the late NBA legend, was once spotted ordering the Double Meat during his In-N-Out visits. For someone who always stayed fit but had a strong appetite, this burger was the perfect fit.
Add Chopped Chilies for a Spicy Twist
If you’re someone who loves a little heat in their meal, don’t forget to ask for chopped chilies on your burger or fries. This lesser-known option from the In-N-Out secret menu adds a spicy kick to any order, elevating the flavor without overpowering the dish.
The chopped chilies can be added to any burger, whether you’re going for a 3×3, Animal Style, or even a simple Grilled Cheese. For those who enjoy experimenting with flavors, the chilies bring an exciting dimension to your meal.
Spicy Secret: Chrissy Teigen has mentioned her love for spicy food, and she often opts for chopped chilies when she orders from the In-N-Out secret menu.
Mastering the Fries: Light, Extra, and Everything in Between
While In-N-Out is famous for its burgers, the fries also have a cult following—especially when you know the secret ways to customize them. The standard fries are hand-cut in-house from fresh potatoes, but did you know you can adjust the cooking style to suit your preference? The In-N-Out secret menu offers several fry customization options, each delivering a slightly different texture and flavor experience:
Light Fries
Do you prefer your fries on the softer side? Then go for Light Fries. These are cooked for a shorter amount of time, giving them a slightly golden color and a soft, almost potato-chip-like texture. This option is great for those who like their fries tender without too much crispiness.
Well-Done Fries
On the other hand, if you enjoy fries that are crispy and crunchy, opt for Well-Done Fries. Cooked longer than the regular fries, these are golden-brown and have a satisfying crunch. They pair particularly well with the Animal Style fries, as the extra crunch contrasts nicely with the melty cheese and savory toppings.
Extra Well-Done Fries
For the true crisp connoisseurs, Extra Well-Done Fries take things up a notch. These fries are left in the fryer for an extended period, resulting in a texture almost akin to potato chips. They’re extra crunchy and ideal if you love a satisfying snap with every bite.
Light-Well Fries
Can’t decide between crispy or soft? **Light-Well Fries** strike the perfect balance between the two extremes. They’re slightly crisp on the outside but retain that fluffy, soft texture on the inside. This option offers the best of both worlds.
Extra Fries Tips
Don’t be afraid to customize further! Some fans like to add cheese to their fries for a simple cheesy fry, while others go all out with Animal Style toppings. The In-N-Out secret menu allows for endless creativity when it comes to how you enjoy your fries.
—
Final Thoughts on the In-N-Out Secret Menu
The In-N-Out secret menu offers something for everyone, whether you’re a meat lover, a vegetarian, or just someone looking to try something new. From the indulgent Animal Style fries to the simple yet satisfying Flying Dutchman, these hidden items are designed to please your taste buds in ways the regular menu can’t.
If you’re ready to explore the In-N-Out secret menu, don’t be afraid to get creative with your orders. Mix and match different elements to craft your perfect meal. And who knows? Maybe your order will become the next viral secret item. I know that In-N-Out is not everywhere, but if you’re interested in visiting a location, here’s the link from their website that shows their locations: https://www.in-n-out.com/locations.
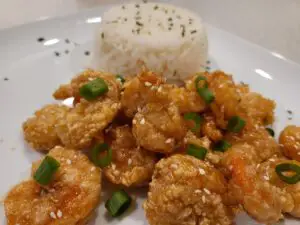
If you’re not in the mood for fast food, try one of my homemade recipes, like my Sesame Shrimp! https://lifewithdenise.com/2022/07/sesame-shrimp-recipe/. Make sure to tag me in all your wonderful creations on Instagram, @realdenisewilliams. I can’t wait to see them!
The post In-N-Out Secret Menu appeared first on Life With Denise.
]]>The post Difference between Latte and Cappuccino appeared first on Life With Denise.
]]>
In this blog post, we’ll explore the difference between latte and cappuccino, break down their unique characteristics, and even give you a full recipe for each drink. I’ll also share the exact machine I’ve been using that is under $200, and an even more affordable option from the same brand, that runs around $139.00. I’ve seen it on sale even lower than that many times.
What is a Cappuccino?
A cappuccino is a classic Italian coffee drink that dates back to the early 20th century. In its simplest form, it consists of equal parts espresso, steamed milk, and milk foam. This 1:1:1 ratio gives cappuccinos their signature taste and texture. The foam on top of the cappuccino adds a light, airy feel, while the espresso delivers a bold flavor.
The Key Ingredients in a Cappuccino:
- Espresso: This is the foundation of any cappuccino. It offers that deep, rich coffee flavor that shines through the milk.
- Steamed Milk: Steamed milk is added to balance out the intensity of the espresso.
- Milk Foam: Finally, a thick layer of milk foam sits on top, creating that characteristic texture and creaminess. The foam provides both an aesthetic appeal and a slight sweetness.
Cappuccino Recipe:
To make a cappuccino, you will need:
– 1 oz espresso
– 1 oz of steamed milk
– 1 oz of milk foam
Instructions:
- Start by brewing one shot of espresso using your espresso machine.
- Steam your milk using the steam wand until it reaches a creamy, frothy consistency. Be careful not to overheat the milk, as this can impact the flavor.
- Pour the steamed milk over the espresso, then add a thick layer of milk foam on top.
- For an extra touch, sprinkle cocoa powder or cinnamon on top of the foam.
What is a Latte?
A latte, short for “caffè latte,” translates to “milk coffee” in Italian. The difference between latte and cappuccino primarily lies in the milk-to-espresso ratio. Unlike a cappuccino, a latte is mostly milk, which gives it a creamier, smoother texture. A typical latte contains much more steamed milk and less foam than a cappuccino.
The Key Ingredients in a Latte:
- Espresso: Like the cappuccino, the base of a latte is a shot of espresso.
- Steamed Milk: A latte contains a larger volume of steamed milk, typically around 6-8 ounces, which creates a velvety texture.
- Milk Foam: Lattes do include a small amount of milk foam, but it’s much less than in a cappuccino, generally about a thin layer.
Latte Recipe:
To make a latte, you will need:
– 1 shot of espresso (about 1 ounce)
– 6-8 ounces of steamed milk
– A thin layer of milk foam (optional)
Instructions:
- Brew a shot of espresso using your espresso machine.
- Steam 6-8 ounces of milk until it reaches a silky, smooth texture. The goal is to heat the milk without creating too much foam.
- Pour the steamed milk over the espresso, leaving a small amount of space at the top for a thin layer of milk foam.
- If you like, add a flavoring syrup or sprinkle of nutmeg for an extra kick.
The Main Difference Between Latte and Cappuccino
Now that we’ve gone through the recipes, let’s highlight the main differences between a latte and a cappuccino. The key distinction lies in the proportions of milk and foam. A cappuccino is a stronger coffee drink with a more balanced ratio of espresso, steamed milk, and foam. On the other hand, a latte is creamier and milkier, with only a small amount of foam.
Another difference between latte and cappuccino is the texture. Cappuccinos have a thick layer of foam that creates a velvety mouthfeel, while lattes are smoother and silkier. Furthermore, the milk in a cappuccino is steamed less than in a latte, which enhances the coffee flavor in cappuccinos.
Milk Texture: The Defining Element
The milk texture is another significant difference between latte and cappuccino. In a cappuccino, the milk is foamed more aggressively, resulting in a thicker, drier foam that sits atop the espresso. This foam adds an airy element to each sip, offering a contrast between the bold espresso and the light, frothy milk.
In a latte, the milk is steamed to create a smoother, creamier texture. Since there’s less foam, the latte has a more unified consistency throughout. The milk in a latte blends seamlessly with the espresso, creating a beverage that’s ideal for those who prefer a milder coffee flavor.
How to Choose Between a Cappuccino and a Latte
When deciding between a cappuccino and a latte, it often comes down to personal preference and how much you enjoy milk with your coffee. If you like a stronger coffee taste with a more textured foam, a cappuccino might be your go-to. But, if you prefer a smoother, more velvety drink with a creamy consistency, a latte is the ideal choice.
Additionally, cappuccinos are usually smaller in size compared to lattes. A traditional cappuccino is about 6 ounces, while lattes are typically served in 8-ounce or 12-ounce cups. This size difference can also impact your choice depending on how much milk you want in your coffee.
Variations of the Latte and Cappuccino
Both cappuccinos and lattes have evolved over time, and there are now numerous variations you can try. These variations offer a fun way to customize your drink and experiment with different flavors.
Variations of the Latte:
- Flavored Latte: Popular options include vanilla, caramel, and hazelnut lattes.
- Iced Latte: Perfect for hot summer days, an iced latte is simply a chilled version of the traditional drink, served over ice.
Iced Matcha Latte
– Matcha Latte: Made with matcha powder instead of espresso, this green tea latte offers a vibrant color and earthy flavor. I have an easy recipe here for you to use that is so delicious! https://lifewithdenise.com/2024/06/matcha-latte-recipe/. Just add ice to make it an Iced Matcha Latte!
Variations of the Cappuccino:
- Dry Cappuccino: This version contains less steamed milk and more foam, offering a lighter texture.
- Wet Cappuccino: A wet cappuccino has more steamed milk and less foam, making it closer to a latte in texture.
- Flavored Cappuccinos: Just like lattes, you can add syrups to your cappuccino for extra flavor.
Which One is Healthier?
If you’re wondering about the health implications, the difference between latte and cappuccino plays a role. Cappuccinos generally contain fewer calories due to the smaller amount of milk. Lattes, with their higher milk content, will naturally have more calories, especially if you opt for whole milk.
If you’re watching your calorie intake but still want a creamy coffee, a cappuccino is likely the better option. However, both drinks can be customized with milk alternatives such as almond milk or oat milk to reduce the calorie count and cater to dietary preferences.
The Perfect Coffee Machine for Making Cappuccinos and Lattes at Home
To recreate your favorite coffee drinks at home, having the right equipment is essential. I use this machine from Amazon, which makes crafting cappuccinos and lattes a breeze. You can find it here: https://amzn.to/3ZfLrhe. This machine is perfect for beginners and seasoned coffee aficionados alike. It’s easy to use, and most of its parts are dishwasher-safe, making cleanup hassle-free. The part that is not dishwasher safe, the portafilter, can be replaced for a higher quality one that is dishwasher safe.

Pic of exact, dishwasher safe portafilter that I use for my machine. Not all portafilters fit the same machine, so if you purchase a different machine and want to upgrade your portafilter, make sure you get the right size replacement. A good quality portafilter makes all the difference when it comes to your coffee tasting of higher quality.
Here is the link to the exact portafilter that is dishwasher safe and fits this exact machine that I use. https://amzn.to/3zaUo0t
If you’re looking for a more affordable option without sacrificing quality, I highly recommend this other model from the same brand: https://amzn.to/3Xwuw8x. It’s a fantastic choice if you’re just starting out or are on a budget.
Conclusion
In summary, the difference between a latte and a cappuccino boils down to the amount of milk and foam. Cappuccinos offer a stronger coffee flavor with a textured foam, while lattes are creamier and smoother. Whether you prefer the boldness of a cappuccino or the velvety texture of a latte, both drinks can be customized to fit your taste preferences.
Now that you know the difference between latte and cappuccino, why not try making them at home? With the right tools, you can enjoy your favorite coffee drinks without leaving your kitchen. And don’t forget to check out the espresso machines I mentioned above—they make all the difference when it comes to crafting the perfect cup of coffee.
If you all have any questions, or just want to show me the delicious lattes and cappuccinos you make at home, feel free to tag me on Instagram, @realdenisewilliams. Can’t wait to see all your delicious coffees! If you want to learn how to make a delicious and healthy matcha latte without any special equipment, follow this link: https://lifewithdenise.com/2024/06/matcha-latte-recipe/
The post Difference between Latte and Cappuccino appeared first on Life With Denise.
]]>The post Rasta Pasta appeared first on Life With Denise.
]]>Here are the ingredients.
Ingredients for Rasta Pasta:
- 2 tbsp of oil
- 2 heaping tbsp of butter
- Pack of chicken tenderloins
- Pack of jumbo shrimp
- 4 heaping tbsp of Walkerswood Jerk Seasoning – link on Amazon: https://amzn.to/3zcr1e8
- 1 yellow pepper
- 1 red pepper
- 1 green pepper
- ½ cup sliced green onions/scallions
- 2 tbsp of minced garlic
- 1 pint of heavy cream
- ½ cup of vegetable stock
- 1 package of grated parmesan cheese
- 1 package of Tillamook Mozzarella cheese
- 1 tbsp of sugar
- ½ tbsp of salt – add more or less for preferred taste
- ½ tbsp of pepper – add more or less for preferred taste
- 16 oz of dried pasta – I love to use Rigatoni
- 1 tbsp of garlic powder
- ½ tbsp of smoked paprika
Step 1: Preparing the Chicken and Shrimp
Start by seasoning the chicken tenderloins with 2 tablespoons of jerk seasoning. Ensure each piece is evenly coated. Heat 2 tablespoons of oil in a large skillet, with 2 tablespoons of butter, over medium-high heat. Once the oil and butter are hot, add the chicken tenderloins to the pan. Cook the chicken for about 5-6 minutes per side, or until fully cooked and golden brown. Once cooked, remove the chicken from the skillet and set it aside.
Next, prepare the shrimp by seasoning them with the remaining 2 tablespoons of jerk seasoning. Add more butter or oil if needed. Add the shrimp to the skillet. Cook them for about 2-3 minutes per side, or until they turn pink and opaque. Remove the shrimp from the skillet and set them aside with the chicken.
Step 2: Cooking the Vegetables for the Rasta Pasta sauce
Now, it’s time to add some color and flavor with the bell peppers. Slice the yellow, red, and green bell peppers into thin strips (Julienne style). In the same skillet, melt 2 heaping tablespoons of butter, with 2 tablespoons of oil, over medium heat. Once the butter is melted and the oil is medium hot, add the sliced peppers and diced onions.
Sauté for about 5-7 minutes until they soften. The vibrant colors of the peppers will brighten the dish. Add 2 tablespoons of minced garlic. Sauté the garlic for about 1 minute, allowing it to release its aroma.
Step 3: Cooking the Pasta
While the peppers and onions are cooking, it’s time to cook the pasta. Fill a large pot with water and bring it to a boil. Add a pinch of salt to the boiling water. Then, add the dried Rigatoni pasta to the pot. Cook the pasta according to the package instructions, usually about 10-12 minutes, until it is al dente.
Once the pasta is cooked, drain it well and set aside.
Step 4: Making the signature Rasta Pasta sauce
With the vegetables cooked, it’s time to create the rich, creamy sauce that makes Rasta Pasta so indulgent. Pour 1 pint of heavy cream into the skillet with the vegetables. Stir the cream gently to combine it with the sautéed vegetables.
Add ½ cup of vegetable stock to the skillet. This adds depth to the sauce, balancing the richness of the cream. Now, it’s time to add the cheese. Sprinkle in the grated parmesan cheese, and then the mozzarella cheese. Stir until the sauce is smooth, creamy, and the cheese is fully melted.
Let it simmer for a few minutes allowing the sauce to reach your desired thickness. Next, season the sauce with ½ tablespoon of salt, ½ tablespoon of pepper, 1 tablespoon of sugar, 1 tablespoon of garlic powder, and ½ tablespoon of smoked paprika. Stir the sauce until the seasonings are fully incorporated.
Step 5: Bringing the Rasta Pasta All Together
Add the cooked pasta directly to the skillet with the creamy sauce. Toss the pasta in the sauce, ensuring each piece is thoroughly coated.
Now that the pasta is perfectly coated in the creamy sauce, it’s time to bring the dish together. Add the cooked chicken and shrimp back into the skillet. Toss everything together gently, allowing the chicken and shrimp to warm through and soak up the creamy sauce.
Taste the Rasta Pasta at this point and adjust the seasoning if necessary. You can add more salt, pepper, or jerk seasoning based on your preference. If the sauce seems too thick, you can thin it out with a bit more vegetable stock or make it thicker with more cheese, if you have it on hand. Also, remember that the sauce will naturally thicken as it sits so don’t thicken it too much.
Step 6: Serving the Rasta Pasta
Once everything is combined, and the flavors have melded together, it’s time to serve your Rasta Pasta. Scoop generous portions of the pasta onto plates, making sure you have a generous amount of jerk chicken and shrimp. Always make an artsy statement by including plenty of the colorful peppers in the creamy sauce. The colors of the peppers make the dish stand out.
For an added touch, sprinkle sliced green onions on top. The green onions add a pop of color and a mild onion flavor that complements the richness of the dish.
Conclusion: Serve and Enjoy
My husband had 3 servings of this and we still had Rasta Pasta leftovers. Let me tell you. The pasta the next day tastes even better! I like to put aside a little bit of sauce when I’m cooking so I can save it and drizzle over the pasta the next day to give it added freshness. Let me know how it turns out, and don’t forget to tag me on Instagram, @realdenisewilliams.
If you loved this recipe, you gotta try one of my delicious, easy breakfast options. Here is my recipe for my Egg Quesadilla with bacon and potatoes. So easy and you will love how yummy it is: https://lifewithdenise.com/2022/07/egg-quesadilla-recipe/
The post Rasta Pasta appeared first on Life With Denise.
]]>The post KFC Fried Chicken Recipe appeared first on Life With Denise.
]]>Most importantly, the base of the recipe starts with high-quality chicken. KFC uses fresh chicken pieces, ensuring they are tender and juicy. The chicken is usually soaked in buttermilk, which tenderizes the meat and adds flavor. Buttermilk also helps the seasoning stick to the chicken better.
Another crucial key to KFC’s Fried Chicken Recipe flavor is the seasoning mix. Although the original recipe remains secret, it’s believed to include ingredients like salt, black pepper, and paprika. Other likely ingredients are garlic powder, onion powder, dried thyme, and dried basil. Some speculate that white pepper, mustard powder, and celery salt are also part of the mix.
Here is my version of KFC’s Fried Chicken Recipe.
Ingredients:
- 2 cups all-purpose flour
- 1.5 tsp dried thyme leaves
- 1.5 tsp dried basil leaves
- 1 tsp celery salt
- 2 tsp of salt
- 1 tbsp ground black pepper
- 1 tbsp ground yellow mustard
- ¼ cup paprika
- 2 tbsp garlic salt
- 1 tbsp ground ginger
- 3 tbsp ground white pepper
- 1 large carton of buttermilk
- 1 egg, beaten
- 8-10 pieces of a whole chicken (drumsticks, thighs, breasts)
- Enough canola oil to fill a Dutch pot for frying
- Aluminum foil
- MSG seasoning, like Accent – – – >> here is a link to the one I used on Amazon: https://amzn.to/3XicyXy
- Baking Sheet with Wire Rack (to place on top of baking sheet) – – – >> here is a link to it on Amazon: https://amzn.to/3XgTWqB.
- Dutch oven pot – – – >> here is a link to a good one on Amazon: https://amzn.to/4cEmz5C
- 2 Mixing bowls – – – >> here is a link to a set of mixing bowls on Amazon: https://amzn.to/3MjT5zq
- A sealable Tupperware container big enough to brine 8-10 pieces of chicken overnight in buttermilk. – – – >> these are the containers I use and they come with a lid: https://amzn.to/4dUN7AL.
- Tongs – – – >> here is a link to some inexpensive, good ones on Amazon: https://amzn.to/3X7abFM.
***For the chicken to retain its moisture, brine the chicken in buttermilk overnight.
Directions for KFC’s Fried Chicken Recipe:
Making the batter
- In a large mixing bowl, combine all the herbs and spices with the all-purpose flour. Set it aside.
- In another mixing bowl, crack an egg and whisk it until smooth.
- Take the chicken that has been brining overnight out of the fridge and mix it with the beaten egg so that all chicken is covered in egg and buttermilk.
- Preheat the oven to 175 degrees Fahrenheit (F).
- Take a large baking sheet and line it with aluminum foil. Place a wire rack on top of the lined baking sheet. We will use this to put the fried chicken in the oven at the very end for the perfect crunchy texture.
We are now at the frying stage for KFC’s Fried Chicken Recipe
- In a large Dutch oven pot, heat your canola oil. I like to fill the Dutch pot about halfway with oil to ensure a good deep fry.
- Make sure the oil reaches a stable temperature of 350 degrees F. Use a thermometer to measure accuracy. Once the oil reaches 350 degrees F, reduce the heat to medium-low.
- Take the chicken, one by one, and place each piece in the flour mixture making sure all sides are coated. Press down firmly to ensure the flour mixture adheres to all sides of your chicken. Shake off any excess flour and slowly lower the chicken into the hot oil in your Dutch pot. I usually fry about 4 pieces at a time. Always make sure to allow the oil to return to 350 degrees F before adding more chicken. Repeat the same process of dredging the chicken in the flour mixture and frying until all chicken is fried.
- Cook the chicken for approximately 12 minutes, making sure to turn the chicken halfway through with some tongs. The chicken will be a gorgeous gold brown color. It will not be fully cooked yet, so don’t freak out if you take it out and the inside still needs cooking. That is why we finish it in the oven until it reaches the desired cooked internal temperature of 165 degrees, while preserving the crunch of the fried chicken, and not over frying the batter.
Time to bake it to finish cooking and give it the perfect crunch!
- Transfer your chicken onto the wire rack on top of your aluminum foil lined baking sheet.
- Sprinkle lightly with MSG (I used Accent). Be careful not to use too much or your chicken will be extremely salty. It only needs a little dusting.
- Then, place your chicken in the oven to continue cooking until the internal temperature reaches 165 degrees.
So, I had a lot of fun making this video and editing it. My hubby and I actually created the song using AI with my recipe incorporated into the lyrics. Please watch the video for clarity on any of the steps above. This video has the complete breakdown of this recipe from beginning to end. You can watch every step of this recipe in this video as I prep, coat the chicken in the batter, and fry it with you, all in a 3-minute video. Pause the video as you cook with me.
Grab a glass of wine like I do in my video and make my version of KFC’s Fried Chicken Recipe with me!
By the way, the leftover fried chicken tasted even better the next day! I popped the chicken into my air fryer for 5 minutes and it was pure perfection the next day. My husband didn’t mind re-heating the chicken in the microwave. I prefer the air fryer because it comes out crispier, but both ways taste amazing. There is something about these herbs that just make this chicken so tasty. I can’t wait for you guys to recreate this at home. Let me know what you guys think and don’t forget to tag me on Instagram, @realdenisewilliams, so I can see all your delicious creations!
If you’re still hungry when you wake up in the morning, try my fluffy Cinnamon Roll Pancakes with cream cheese icing. They are amazing! Here is a link to them: https://lifewithdenise.com/2021/01/cinnamon-roll-pancakes/.
The post KFC Fried Chicken Recipe appeared first on Life With Denise.
]]>The post Matcha Latte Recipe appeared first on Life With Denise.
]]>I started making my own dairy free matcha lattes at home and I just felt a bit more clarity and peace every morning when I incorporated drinking matcha into my daily routine. If you came here just for the recipe, scroll straight down. If you want to know a little bit about the background of matcha and its health benefits, keep reading.
Matcha, a finely ground powder of specially grown and processed green tea leaves, has been a staple in Japanese culture for centuries. This vibrant green tea is more than just a drink; it’s a superfood packed with health benefits that enhance both your physical and mental well-being. Whether you’re looking to boost your energy, improve your focus, or simply enjoy a delicious and nutritious beverage, matcha has something to offer.
The Nutritional Powerhouse
Matcha stands out from other green teas because of its unique cultivation process. The tea plants are shade-grown for about three weeks before harvest, increasing the chlorophyll and amino acid content. This results in a rich, vibrant green color and a higher concentration of nutrients. When you drink matcha, you’re consuming the entire tea leaf, which means you’re getting a higher concentration of antioxidants, vitamins, and minerals compared to steeped green tea.
This Matcha Latte Recipe is Antioxidant Rich
One of the most notable health benefits of matcha is its high antioxidant content. Antioxidants are compounds that help fight free radicals in the body, which can cause cellular damage and contribute to aging and various diseases. Matcha is particularly rich in a type of antioxidant known as catechins, with epigallocatechin gallate (EGCG) being the most potent. Studies suggest that EGCG may have cancer-fighting properties, support heart health, and boost metabolism.
Enhances Mental Clarity and Focus
Matcha contains a unique combination of caffeine and the amino acid L-theanine. While caffeine provides a gentle energy boost, L-theanine promotes relaxation without drowsiness. This synergy results in a calm alertness, enhancing mental clarity and focus. Many people find that matcha gives them sustained energy without the jitters or crash often associated with coffee. I find that my dairy free matcha lattes soothe me, while sustaining me with energy throughout the day.
Supports Weight Loss
If you’re looking to shed a few pounds, matcha might be a helpful addition to your diet. The catechins in matcha, particularly EGCG, have been shown to increase metabolism and fat oxidation, helping the body burn calories more efficiently. Additionally, matcha can help regulate blood sugar levels, reducing cravings and preventing overeating.
Detoxifies Naturally
The high chlorophyll content in matcha gives it a natural detoxifying property. Chlorophyll is known for its ability to bind with heavy metals and toxins in the body, aiding in their elimination. Drinking matcha regularly can help cleanse your system and support overall liver health.
My Matcha Latte Recipe helps Boost Immunity
Matcha is rich in vitamins and minerals such as vitamin C, selenium, chromium, zinc, and magnesium, all of which are essential for a healthy immune system. The potent antioxidants also play a role in enhancing immune function, making matcha a great choice for maintaining your overall health and well-being.
Matcha Latte Recipe
Now that you’re aware of the incredible health benefits of matcha, let me share with you my favorite way to prepare this delightful beverage. My matcha latte is creamy, slightly sweet (just like me, lol), and perfect for ANY time of the day. I have included direct links to Amazon in case you want to purchase the items directly. As an Amazon Associate, I do earn commissions from qualifying purchases.
Matcha Whisk Set
You do not have to have a matcha whisk set, but I definitely do recommend purchasing one. I got mine off Amazon and it comes with everything you need for such an affordable price. Linking it here: https://amzn.to/3z2ACE3
Ingredients:
– Ceremonial grade matcha (I use AIYA Organic Ceremonial Grade Matcha – https://amzn.to/3VDOsFD
– A cup of oat milk (you can use any milk option, but this is my fav) – https://amzn.to/4cBp21l
– A tablespoon of sugar
– Dairy-free whipped cream (I use the almond-milk or coconut one) – https://amzn.to/3VEfBrX
– A drizzle of your favorite honey
Matcha Latte Recipe:
- Measure the Matcha: Start with one teaspoon of ceremonial grade matcha powder. I personally use AIYA Organic Ceremonial Grade Matcha, which I purchase at Sprouts Farmers Market. You can also find it on Amazon.
- Whisk the Matcha: Place the matcha powder in a small bowl. Add a few tablespoons of oat milk to the matcha powder. Using a bamboo whisk (chasen), whisk the mixture in a zigzag motion until the matcha is fully dissolved and frothy. This ensures that the matcha is well blended and free of lumps.
- Sweeten It Up: Add a tablespoon of sugar to the whisked matcha. Adjust the sweetness to your preference.
- Add the Oat Milk: Pour a cup of oat milk (or your preferred milk) into the whisked matcha. Stir gently to combine. Top your dairy free matcha latte with a generous dollop of dairy-free whipped cream.
- Finish with Honey: Drizzle a little honey over the whipped cream for an extra touch of sweetness and a beautiful presentation.
Enjoy your Matcha Latte Recipe! This recipe is not only delicious but also a wonderful way to enjoy the numerous health benefits of matcha. Whether you’re starting your day or taking a midday break, a matcha latte can be a delightful and nutritious treat.
This Matcha Latte Recipe pairs so well with my Dairy Free Banana Bread Recipe! Here is the link:
https://lifewithdenise.com/2022/06/dairy-free-banana-bread/
Make sure to tag me, @realdenisewilliams, so I can see all your beautiful pics!
The post Matcha Latte Recipe appeared first on Life With Denise.
]]>The post Chokers are back! appeared first on Life With Denise.
]]>There is an impressive variety of chokers, from minimalist to elaborate, grunge to glam. Material choices span across velvet, leather, lace, pearls, crystals, metals, and even tattoo styles. The beauty of this trend lies in its adaptability – a choker can be as unique as the person wearing it.
Why all the hype with chokers?
Chokers are making waves because of their ability to blend with various fashion styles. Whether you’re into boho, punk, or classic chic, there’s a choker for you. For example, a floral choker complements a bohemian look, while a studded leather choker adds an edge to a punk outfit. This versatility allows chokers to fit seamlessly into any fashion narrative, enhancing your overall aesthetic.
How to Wear Chokers
There are countless ways to incorporate a choker into your outfit, regardless of your aesthetic preferences.
Casual…but dress it up!
The combination of a black choker with some cargo jeans or a skirt is the epitome of casual chic. The choker adds a touch of sophistication, proving that less is often more. Pair this with a chic, black leather crop tank top and you’re set. I love how I paired this simple black choker with a cargo skirt and some boots for Memorial Day weekend!

Elegant Ensemble
For a night out or an elegant event, a crystal, gold, or pearl-encrusted choker paired with an ivory or white dress/linen pants will make you stun. This blend of classic and contemporary showcases the power of a choker to elevate an ensemble. Take a look at Anne Hathaway’s stunning look at the Met Gala celebrating Karl Lagerfield. She wore a custom Versace gown with a gorgeous gold choker that made the entire look sophisticated and timeless.

Anne Hathaway – 2023 Met Gala; Pic credit: @annehathaway IG
Flowers
It’s Spring and big, fluffy flowers on chokers are super cute and fun! They can also add a romanticizing touch to any outfit. I dressed up a sleeveless, black dressy jumpsuit with a black velvet choker and red rose. I matched it with a red lippie, pinned back my curls and added a few curls to frame my face. The soft curls and the choker really made it a sexy, romantic look and was a total vibe. It definitely turned heads.

Where to Shop for Chains and Chokers
Chokers have become widely available thanks to their renewed popularity. From luxury boutiques to online marketplaces, there are endless options to satisfy every style and budget.
In addition, chokers are available at various price points, making them accessible to everyone. You don’t need to break the bank to own a stylish choker. Many affordable brands offer beautiful options that look just as chic as their high-end counterparts. This affordability factor contributes to their popularity, as fashion enthusiasts can easily add multiple chokers to their collection without overspending.
Transitioning to seasonal trends, chokers are perfect for any time of year. In the summer, a light, airy choker can complement a breezy dress, while in the winter, a velvet or metallic choker can add a festive touch to your outfit. Their adaptability to different seasons ensures that you can wear them year-round, making them a versatile addition to your accessory collection.
High-End Boutiques
Boutiques like Gucci, Chanel, and Tiffany & Co. offer an exquisite selection of chokers for those seeking luxury. These brands provide meticulously crafted pieces made with high-quality materials and avant-garde designs, each carrying a distinctive elegance.
Online Marketplaces
Platforms like Etsy and Amazon are a treasure trove for unique, handmade, and vintage chokers. Independent artisans create truly one-of-a-kind pieces that make a statement.
Here is a link to a super affordable flower choker on Amazon that can be dressed up or down. It’s regularly priced on Amazon for $7.99, and sometimes even goes on sale for lower than that!
https://www.amazon.com/YURAOER-Flower-Choker-Necklace-Women/dp/B0C3QY89Y9
Affordable Retailers
Budget-friendly retailers like H&M, Forever 21, and Zara are perfect for fashionistas looking to stay on-trend without breaking the bank. These stores offer a vast assortment of chokers, ranging from minimalist to statement pieces.
Also, don’t forget to take care of them once you buy them to ensure they last. Store them properly to avoid tangling or damage. Clean them according to the material they’re made from, and handle them with care to maintain their appearance. By doing so, you’ll keep your chokers looking chic and stylish for years to come.
Conclusion
The choker trend has exploded, bringing an added edge to the fashion landscape. Because their versatility allows them to be dressed up or down, transitioning seamlessly from day to night, casual to formal, and everything in between is easy. And, with so many places to purchase these accessories, anyone can take part in this resurging trend. Chokers, once again, are more than a mere accessory; they’re a fashion statement, a mode of self-expression, and a reflection of the era. So, don’t hesitate to revive this ’90s trend and incorporate it into your own unique style.
In conclusion, the choker accessory trend is back and thriving. Because of its chic appeal, versatility, and ability to elevate outfits, it is a must-have in any fashion lover’s collection. From casual looks to high fashion ensembles, chokers are everywhere, proving that this trend is here to stay. So, why not embrace the choker revival and add a touch of sophistication to your style?
For more fashion tips, check out this article on my “5 Must-Have Wardrobe Pieces for Outfit Inspo.” Here is the link:
https://lifewithdenise.com/2022/06/outfit-inspo-5-must-have-wardrobe-pieces/
Please tag me on Instagram, @realdenisewilliams, in all your beautiful pics and videos so I can see your looks!! Can’t wait babes!
The post Chokers are back! appeared first on Life With Denise.
]]>The post Egg Quesadilla Recipe appeared first on Life With Denise.
]]>Serving Sizes for your Egg Quesadilla
I normally make double or triple the egg quesadilla recipe, depending on how many hungry mouths I’m feeding at the moment lol! This is because the ingredients I’ve listed are for two servings, or one serving of the entire quesadilla if someone is hungrier. Therefore, boil 2-3 potatoes, diced, and then refrigerate whatever you don’t use for later. Also, depending on how many potatoes you are boiling, this can range from 5-10 minutes, give or take. Stick a fork in the potatoes to check if they are “almost” done. Do not cook them completely well done, just a tad before that. The potatoes will continue cooking on their own to completion once they’re spread on to the panini press.
Once the potatoes are “almost done,” take them off the heat and immediately throw in a strainer so that the water doesn’t keep cooking the potatoes. Then, run a bit of cold water over the diced potatoes, while they’re in the strainer, to cool them down and prevent them from further cooking.

Cooking your Egg Quesadilla:
- Heat about a splash of olive oil to a sauté pan on medium. Throw your diced onions and peppers in. Sauté for a few minutes until they start to become soft.
- Season the potatoes with some garlic powder, salt, pepper, and parsley. Take your diced potatoes and add them to the onion and pepper sauté mix. Cook until your potatoes are nice and golden. Take off heat and set pan aside.
- Now it’s time to cook your bacon. Use about 2 slices of bacon, chopped, per egg quesadilla. If you want this to be a very high protein quesadilla, add more protein here. Protein options to use are bacon, sausage, ham and anything high in protein. If you’re going to be making multiple egg quesadillas, cook all your bacon at once to keep it simple. Cook your bacon until desired, keeping in mind that they will continue to cook for a bit when they are scrambled in with the potatoes and eggs. Once your bacon is done, pat the bacon dry with some paper towels to drain the excess oil. Chop the bacon into smaller pieces.
- Then, take your bacon and add it to your diced potatoes and veggie mix. Mix well.
- Scramble your eggs in a small mixing bowl. Add a little salt, pepper, a sprinkle of paprika, and a dash of parsley. Feel free to use your favorite seasonings. I know a lot of you may not want any seasonings, and that’s okay. It tastes delicious regardless.
- Turn the heat on Medium to the sauté pan containing all your mixings (potatoes, veggie mix and protein toppings).
- Add your scrambled eggs to the pan, being careful to spread it evenly throughout the whole pan.

Cook your egg mixture with all your proteins and toppings
- Cook for a few minutes, until your eggs are almost done.
- Then, add your shredded cheese to the entire scramble and cook for a few minutes more until everything looks done to your liking.
- Now, turn off the heat and set aside.
Time to use your Panini Press on your Egg Quesadilla

- It’s time to prepare your high protein breakfast quesadilla. I normally like to prepare it directly on the panini press to avoid spillage. I place one tortilla on the panini press.
**These are the gluten free tortillas I like to use:
https://www.amazon.com/Mission-Gluten-Free-Tortillas-Count/dp/B06XJP6WB6/
- Take a little bit of shredded cheese and sprinkle it lightly over the tortilla to help the tortilla and the toppings all stick together well.
- Spread the freshly prepared egg scramble around the tortilla. Do not overstuff your egg quesadilla. Spread the egg scramble and add a bit more cheese to the top to make the flour tortilla stick together better.

- Then, take your second tortilla and place it directly on top of the scramble with cheese, taking note to place it directly above the bottom tortilla so that they are evenly on top of each other.

- Slowly and carefully close your panini press over your egg quesadilla. Every panini press is different. Cook your egg quesadilla until they are nice and golden brown, with nice golden lines in them.

- Once you’ve achieved that golden look with the nice, pressed lines and texture, get your plate ready and place it right at the edge of the panini press.
- Then, slide your egg quesadilla into your plate or use your spatula under the quesadilla and help slide it onto your plate.
- I like to cut the egg quesadilla into fours and sprinkle a little dried parsley on top for decoration.

How to Serve your Egg Quesadillas:
I like to serve these Egg Quesadillas with a nice little bowl of fruit and some freshly squeezed orange juice in a carafe. I love that my version is gluten and dairy free, but anybody can adapt this recipe to their specific allergy needs!
For another amazing egg recipe, try my Avocado Toast with Egg Recipe! Here is the link: https://lifewithdenise.com/2022/07/avocado-toast-with-egg/
Let me know what you guys think! Make sure to tag me on Instagram, @realdenisewilliams, so I can see all your delicious creations!
xoxo, Denise.
The post Egg Quesadilla Recipe appeared first on Life With Denise.
]]>The post Sesame Shrimp Recipe appeared first on Life With Denise.
]]>I absolutely LOVE Chinese food. However, leading a gluten and dairy free lifestyle has made me shy away from some of my favorite foods, and this is definitely one of them. That obviously didn’t stop me from re-creating this yummy dish without any of you even noticing that it is gluten and dairy free!
The ingredients are super easy to put together. I think a lot of people are always scared to bread any type of food. I mean, let’s be honest. Breading can be messy and, if you don’t do it right, the breading just falls right off. Lucky for you babes, I’ve got the breading down to a science. It works every time and it doesn’t take long at all!
Here are the ingredients that you will need for this delicious Sesame Shrimp:
Ingredients for the Honey Sesame Shrimp Sauce
4 tbsp of honey
4 tbsp of orange juice
2 tbsp of low sodium soy sauce
2 tbsp of sugar
2-3 tsp of corn starch (depending on the level of thickness you want)
2 tsp of olive oil
Ingredients for the Outer Coating Mix
1/3 cup of plain flour >> If you’re GF like me, I used 1-to-1 Baking Flour from Bobs Red Mill: https://www.bobsredmill.com/gluten-free-1-to-1-baking-flour.html
1 cup of corn starch
1/4 tsp baking soda
Other Ingredients for Sesame Shrimp Recipe
1.5 – 2 pounds of shrimp (peeled and deveined)
2 Green Scallions
Sesame Seeds to sprinkle on
Salt and Pepper to your liking
Canola oil for frying (about 2 inches deep in a frying pan)
2 egg whites
Directions:
I personally love a very seasoned sesame shrimp. Actually, I love everything well seasoned. Lol. So, I am NOT SHY when it comes to my seasonings. First, take the shrimp and add some salt, pepper, garlic powder, and a little vinegar. Then, mix it up in a bowl and place the shrimp in a storage Ziplock bag. Now, let it marinade for at least an hour before you use them.
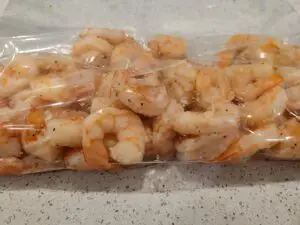
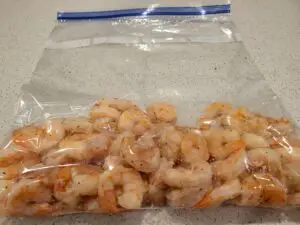
I do this because I hate my shrimp having a really fishy, smelly taste lol. By doing this, it neutralizes that strong fishy scent that sometimes the shrimp has. Additionally, it neutralizes the flavor so that when you add the fried, breaded shrimp to that yummy, sweet sauce, the flavors are mouth-watering!
Let’s start cooking this Sesame Shrimp!
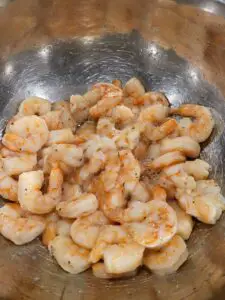
Once you are ready to start cooking, take the shrimp out of the fridge and Ziplock bag, and place in a mixing bowl. Then, depending on how much shrimp you are cooking, take 1-2 egg whites and mix them in with your shrimp. However, only use the egg whites!! Although this may seem weird, the method works!!
Next, in another mixing bowl, add your corn starch, honey, orange juice, low sodium soy sauce, sugar, and olive oil. Also, make sure to mix well so that all of the ingredients are dissolved well. There should be no lumps or sugar or cornstarch. If you have lumps, keep mixing until it is all dissolved.
Then, take your cornstarch, flour, and baking soda and mix it all together in a large, separate bowl.
Time to dip your shrimp in the batter
Now, take your seasoned shrimp mixed with egg whites and coat them evenly with your cornstarch mix. I usually just take my shrimp and throw them in the cornstarch flour mix. I shake them around and I get my hands in it. Yes, it can get a bit dirty. I like to wear disposable gloves. But, it makes it easier if you really mix it good and pat it into the shrimp so that the breading does not fall when you fry the shrimp. Also, make sure the breading coats the entire shrimp. Place the shrimp on a tray or rack and throw out any of the leftover cornstarch flour mix.
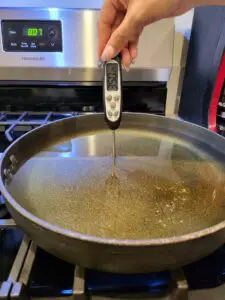
Next, heat your canola oil to 350 degrees. This is crucial. If your oil is not hot enough, the coating will get extremely greasy and soggy. Also, make sure you use your thermometer, as pictured below, to make sure that the oil is at 350 degrees.
Time to fry your Sesame Shrimp!
Finally, once the oil reaches 350 degrees, fry your shrimp. I usually fry them for about 5 minutes. This is how they look frying.

Next, once they get that nice golden color, use a large spoon with holes in them to take them out, allowing the oil to drip out of the holes in the spoon. Place your fried shrimp on a paper towel to absorb the excess oil.

Meanwhile, in a sauté or wok pan, heat up your honey orange sauce on medium until it reaches your desired thickness. I normally don’t like mine too thick. Then, take the fried shrimp and toss it into the pan with the sauce. Toss your sesame shrimp well so that the yummy sauce gets into every crevice of that crunchy, sesame shrimp!

Now, turn off your stove and sprinkle sesame seeds over the top of the shrimp and throw in the chopped green onions as well. I normally serve this Sesame Shrimp with fluffy white rice!! My family goes crazy for it!
Let me know what you guys think and don’t forget to tag me on Instagram, @realdenisewilliams, so I can see all your amazing re-creations of this dish! I can’t wait.
If you’re interested in a yummy breakfast idea that literally takes about 10 minutes to make, check out my Avocado Toast with Egg Recipe: https://lifewithdenise.com/2022/07/avocado-toast-with-egg/
The post Sesame Shrimp Recipe appeared first on Life With Denise.
]]>The post Avocado Toast with Egg appeared first on Life With Denise.
]]>I personally made mine with Gluten Free Sourdough bread, but you can make this with any sliced bread that you prefer! I love sourdough bread and feel it provides a good texture when toasted. You want to make sure that the bread has a good density to it so that when you add all your toppings, it can sustain the weight of it. Additionally, you want it to be toasted enough where you get that nice crunch when you bite into it! Okay, okay. Let’s just get to it, alright?!
Avocado Toast with Egg
Before we get started, I want to tell you guys to play around with your seasonings. I tend to change mine from day to day just to mix it up. This is one variation of seasonings I tend to use the most often. However, if you don’t like the seasonings I use, feel free to keep it out of the recipe. You can also substitute your own seasonings. To be honest, the natural flavors in this light dish really allow you to put little to no seasonings, if you prefer. But, here is my take on it with a little twist. Let me know your variations!
Ingredients
Slice of Sourdough Bread (I use Schar’s Gluten-Free Sourdough bread https://www.schaer.com/en-us/p/deli-style-bread)
1 Egg
A few slices of tomatoes (Pick your favorite here. I had some fresh Roma tomatoes on hand so that’s what I used.)
1/2 Haas Avocado (You can use any avocado you want. It’s easier for me to gauge how much by using a Haas avocado.)
Mayonnaise (You can use regular mayonnaise or Vegan. They both end up yummy.)
Garlic Powder
Parsley
Crushed Red Chili Peppers
Salt
Pepper
Pam Non-stick Cooking Spray
Non-stick Pan
Avocado Toast with Egg Directions:
Prepare your toppings first. Slice a tomato into thin, round slices. Dice your avocado. I personally like my avocado diced. Some people prefer to mush it. You can do either one. However, if you plan on mushing your avocado, you’re going to want that to be your first topping, after you spread the mayonnaise. Then, all your toppings would go on after that.
Toast your bread. I like mine to be a nice medium brown. It gives the avocado toast a nice crunch and really holds the mayonnaise well without becoming soggy. I hate soggy toast!
Spread a layer of mayonnaise on top of your toasted bread.
Take 2 slices of tomato and place them side by side on your toast.
Time to Fry your Egg
Spray Pam into your Non-stick Sauté or Frying Pan. Set heat on Medium. Crack your egg into the pan. When I cook my eggs, I normally like the egg to be a bit runny, but not too much. I cook it just enough to let it ooze out slowly when you cut into it. You can achieve this by not flipping the egg. As long as you cook the egg on medium for a bit, you will be able to achieve the entire egg cooking well. The bonus is that the egg yolk will cook as well, but won’t be too runny. I don’t like to tell people how long to cook the egg for because every stove is different.
Patience and Practice when cooking Sunny Side Up Eggs, Lol.
This may take some practice. I ruined a lot of eggs when I first started to cook eggs to be aesthetically more pleasing. Either way, don’t worry your yolk breaks or doesn’t come out perfect. The egg will taste amazing on this avocado toast regardless. Trust me.
While the egg starts cooking, sprinkle salt and pepper on top. Then, take your garlic powder and lightly sprinkle some over the egg being careful not too sprinkle too much. I like to do just a nice mist or layer of it. Then, I sprinkle some parsley on top of the egg. Finally, I take the crushed red pepper and sprinkle some on top of the egg as well.
Make your Avocado Toast with Egg appealing
Place the fried egg on top of the tomatoes, making sure to center it on top.
Take your diced avocado and put as much as you want all over your eggs.
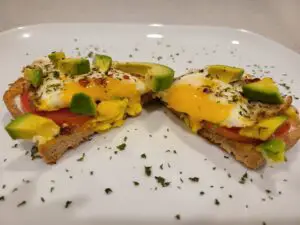
And….ta-da! You’re done! I hope you love it! Let me know what you think and don’t forget to tag me on Instagram, @realdenisewilliams, in all your pretty photos! I can’t wait to see your beautiful creations!
xoxo, Denise
The post Avocado Toast with Egg appeared first on Life With Denise.
]]>The post Two-Part Series on Checking Fake Followers appeared first on Life With Denise.
]]>Trust me. If you are interested in maintaining the health of your Instagram Account, then this Instagram Engagement Rate Calculator is perfect for you!
I created this calculator out of an honest need. I don’t know about you, but I am constantly searching for calculators that can give me an accurate depiction of my Instagram statistics!
However, every website and subscription out there give different information. I guarantee you that if you check your Engagement Rate on 5 different websites, you may get 5 different rates. And, that is not good when you are checking for fake followers.
Why Does This Happen?
There are a few reasons for this. One of them is that they are simply not Instagram. Only Instagram can give you EXACT statistics on your account. It does not matter how much these websites tell you that their information is accurate. I have proved them wrong. More on this in a bit.
I have subscriptions to a few of these websites because I have been tracking my account ever since a bunch of bots appeared on it a few years ago. My Gmail account was also hacked at the same time. A “fashion” page said they were going to shout out my account. What they really did was just send a bunch of bots and fake followers my way deceiving me. They wanted to make it seem like all these followers were from them shouting my account out.
This was simply not true and exactly why it is important to always check the health of your Instagram account by checking fake followers.
Checking Fake Followers – How do they look?
When I looked closely at these accounts, they all looked fake. Some didn’t have a profile pic and others did. One of the key things that I noticed that these bot accounts had were that they barely had any followers. They were following thousands of people. The posts were also quite random with pictures that didn’t make sense. They had no likes or engagement on their profile. And most of their posts, if not all, were all posted on the same day. When checking fake followers, look for these clues.
What did this do to my account?
After these bots appeared on my account, my Engagement Rate went down. I immediately noticed less engagement on my posts and barely any reach. Both my stories and posts were barely being shown to my followers.
Why are we checking fake followers?
We are checking fake followers because Instagram’s algorithm shows your posts to your most active, engaged audience. They also tend to show your posts a bit more to your newer followers. If your profile has a bunch of new bot accounts and fake followers, your posts will be shown to those bots. The problem with that is that obviously these new fake accounts on your profile are being shown your new posts by Instagram. Because these are fake accounts, they cannot engage with your posts, therefore your posts will now barely get engagement.
Meanwhile, your actual engaged followers are wondering why they cannot see your posts in their feed!
I realized what was going on after checking fake followers. I knew I needed to fix my account and fast! It seemed overwhelming and I was completely stressed out. Imagine putting so much work into your content and your followers not being able to see this. It was stressful.
I immediately contacted Instagram and their support team to get further guidance and alert them as to what was going on. They were INCREDIBLY helpful and even called me by phone to help me. I ended up putting two-factor authentication on my account and every possible security issue that I could find was addressed.
But how do I fix my account now after checking fake followers?
My Engagement Rate had tanked, and I needed to do something fast. I knew the only option I had was to MANUALLY remove each one of these accounts. And there were a lot! I know that from previous experiences with Instagram and other Digital Creators, that you have to be careful with the amount of actions that you take on your account daily.
What does this mean?
This means that if your account has a certain number of fake followers that you want to remove, you can’t just remove them all at once. This can trigger a suspension from Instagram. They start off with smaller suspensions, that last anywhere from 24 hours to a few days. If you are a repeat offender, as in, you continue to unfollow or perform too many actions in one day, they can then suspend you for longer. I’ve seen other influencers get suspended anywhere from a week to a whole month.
I’ve also seen accounts banned. And that is the least thing you want to do. So, any advice that I give you will ALWAYS be to follow the Terms and Conditions that Instagram puts forth, even while checking fake followers. Here is a link to those terms:
https://help.instagram.com/581066165581870
Now I know what you’re thinking. How am I violating the Terms and Conditions by just removing all these accounts at once or performing too many actions in one day?
This is because a lot of things at Instagram are automated. There are just too many users on Instagram to monitor every single account by an actual human being. So, Instagram has their automatic checks in place that alert them if someone is doing something unfavorable.
What happens when you perform too many actions at once?
When you perform too many daily actions on your Instagram account, its automated software thinks you are either being too spammy or an actual bot. The Instagram software does not know that you are actually checking fake followers. Instagram does NOT want any bots or spam to be on their platform. They may block your account from performing any more actions, such as, liking and commenting on other people’s posts.
Instagram can block you from following or, in this case, unfollowing anymore accounts. This is because they feel you may be a bot.
So Don’t Over-Do It!
This is why it is important that you don’t overdo it. I personally would NOT unfollow more than 120 to 140 accounts per day. However, everybody has a different limit as to how many actions they can perform from their Instagram account in one day.
Each account is different and Instagram does not tell us how many actions each account can perform so I suggest you start off slow. Unfollow 10 or 20 a day. Then maybe go up to 30 or 40. Work your way up to about 100 accounts per day. Again, every account is different. I cannot tell you what your maximum threshold is of how many accounts you can actually unfollow daily.
If your account is relatively new, your daily limits will be much less than an account that is older and that Instagram trusts more. The older your account gets, the more Instagram will trust you. Just don’t over-do it when checking fake followers.
Checking fake followers regularly to see if your ER is Rising is important.
As you get rid of the bots and fake followers on your account, you will want to see if your Engagement Rate (ER) is improving! It more than likely is, unless you are having another issue with your account. I will do a dedicated blog post on this later in more detail.
Click on the link below to use the Instagram Engagement Rate Calculator that I developed in order to properly keep track of your progress.
https://lifewithdenise.com/2022/07/instagram-engagement-rate-calculator/
I explain how to use it and the different metrics that I created in order to reach the 3 different types of Engagement Rates that my calculator measures. It is good to use this while checking fake followers.
I hope it helps you as much as it is helping me daily! Let me know if you need any help or have any questions. I am active online and can be reached here or on my Instagram, @realdenisewilliams.
xoxo, Denise
The post Two-Part Series on Checking Fake Followers appeared first on Life With Denise.
]]>